A website redesign is a powerful opportunity to redefine your digital presence, but it's far more complex than a simple visual update. A superficial makeover won't deliver lasting results. A successful redesign requires a deep dive into mastering digital customer experience management to truly meet user needs and business objectives. Without a strategic plan, you risk alienating users, losing valuable SEO rankings, and failing to achieve your business goals. This comprehensive website redesign checklist is your roadmap to avoiding those pitfalls.
This guide breaks down the entire process into 10 actionable stages, ensuring your project is built on a foundation of data, user-centric design, and technical excellence. We will move beyond generic advice and provide specific, practical steps for each phase. You'll learn how to conduct a thorough pre-launch audit, define measurable goals, and map out a user-first information architecture. We’ll also cover critical technical aspects like SEO migration, performance optimization, and accessibility compliance, which are often overlooked in a rush to launch.
From initial strategy and content planning to the final QA, launch, and post-launch monitoring, this checklist provides a structured framework. It’s designed to help startups, e-commerce sites, and small businesses navigate the complexities of a redesign with confidence. By following these steps, you can ensure your new website not only looks great but also performs exceptionally, drives conversions, and delivers a superior user experience from day one. Let's dive into the essential items that will guarantee your redesign is a strategic success.
1. Conduct a Comprehensive Website Audit
Before you can build a better website, you must understand your current one's performance inside and out. A comprehensive website audit is the foundational first step in any successful website redesign checklist, providing a data-backed baseline to guide your entire strategy. This process involves a deep dive into your site’s strengths, weaknesses, technical issues, and user experience friction points.
Ignoring this step is like building a house without surveying the land. You risk repeating past mistakes, overlooking critical problems, and basing expensive decisions on assumptions rather than evidence. The goal is to create a detailed report that inventories your assets and identifies precisely what needs fixing, keeping, or enhancing.
Key Areas for Your Audit
To ensure a thorough analysis, your audit should cover several key domains:
- Performance & Technical SEO: Use tools like Google PageSpeed Insights to check loading times and Core Web Vitals. Employ a crawler like Screaming Frog to identify broken links, redirect chains, and duplicate content. For a deeper dive, learn more about how to conduct a comprehensive SEO audit.
- User Experience (UX) & Content: Analyze user behavior with heatmaps and session recordings from tools like Hotjar. This shows you where users get stuck or confused. As part of your comprehensive website audit, it's crucial to thoroughly understand your current performance. Learn how to effectively analyze your website traffic like an expert to identify your most and least popular pages.
- Stakeholder Feedback: Technical data is only half the story. Conduct interviews with your sales, marketing, and customer support teams. They offer invaluable qualitative insights into what customers complain about and what features they request most often.
By combining quantitative data with qualitative feedback, you can prioritize redesign tasks based on their potential impact and the effort required, ensuring your new website is built for success from day one.
2. Define Clear Goals and KPIs
Once you've audited your current site, the next critical step is to define what success looks like for your new one. A website redesign without clear goals is like a ship without a rudder; you might end up somewhere, but it’s unlikely to be your desired destination. Establishing specific, measurable objectives ensures your redesign is a strategic business investment, not just a cosmetic update. This process aligns your entire team around a common purpose and provides a clear framework for measuring return on investment (ROI).

Defining goals moves your project from subjective preferences ("I want it to look more modern") to objective, data-driven outcomes ("We need to increase mobile conversion rates by 25%"). This is an essential part of any comprehensive website redesign checklist because it transforms the project from an expense into a strategic growth driver. These goals will guide every decision, from layout and navigation to content and calls-to-action.
Key Areas for Goal Setting
To create a robust framework, your goals and Key Performance Indicators (KPIs) should be specific, measurable, and tied to business outcomes. Focus on these key areas:
- Business & Conversion Goals: These are the bottom-line metrics. For an e-commerce site, a goal could be to increase the average order value by 15%. A B2B company might aim to generate 30% more qualified leads through a new contact form. Airbnb, for example, famously redesigned its user flow to simplify the booking process, directly impacting conversions.
- User Engagement & Experience Metrics: How do you want users to interact with the new site? Goals could include reducing the bounce rate on key landing pages by 20%, increasing time on page by 40 seconds, or boosting newsletter sign-ups. Slack's redesign focused heavily on improving the user onboarding journey, which resulted in a 40% increase in completion rates.
- Stakeholder & Team Alignment: Involve all key departments (sales, marketing, support, leadership) in goal-setting workshops. This ensures the website serves the entire business, not just one function. Set both short-term (3-6 months) and long-term (12+ months) goals to track immediate impact and sustained performance.
By establishing these KPIs from the outset, you create a benchmark for success. This allows you to objectively evaluate the redesign’s effectiveness post-launch and make informed, data-backed adjustments.
3. Understand Your Target Audience and User Personas
A successful website redesign is not about what you or your team likes; it’s about what your users need. To create a site that truly resonates, you must first deeply understand the people who will be using it. Developing detailed user personas is a critical step in any website redesign checklist, transforming abstract data into relatable, human-centered profiles that guide every design and content decision.
Basing your redesign on internal assumptions is a direct path to a final product that misses the mark. You risk creating a user experience that frustrates your ideal customers, causing them to leave and never return. The goal is to build empathy and ensure that your design choices solve real problems for the people who matter most to your business.
Key Areas for Your Persona Development
To build robust and actionable personas, your research should be a mix of qualitative and quantitative methods:
- Qualitative Research: Conduct one-on-one interviews with 15-20 representative users to uncover their motivations, goals, and pain points. Dig into their daily routines, how they search for solutions, and what frustrates them about your current site. For example, Netflix uses detailed persona research to guide UX decisions differently for a "binge-watcher" versus a "family movie night" planner.
- Quantitative Data: Use surveys to validate the hypotheses you formed during interviews with a larger audience. Analyze demographic and behavioral data from your website analytics to identify common patterns among user segments. Mailchimp famously created detailed personas for small business owners and freelancers, allowing them to tailor features and marketing to specific needs.
- Stakeholder Insights: Your customer-facing teams are a goldmine of information. Interview sales and support staff to learn about the most common questions, complaints, and feature requests they receive. This internal feedback helps round out your personas with real-world business context.
By creating 3-5 primary personas complete with names, photos, and detailed backstories, you transform your target audience from a faceless group into a concrete set of individuals. This ensures every element of your redesign is intentionally crafted to meet their specific needs and expectations.
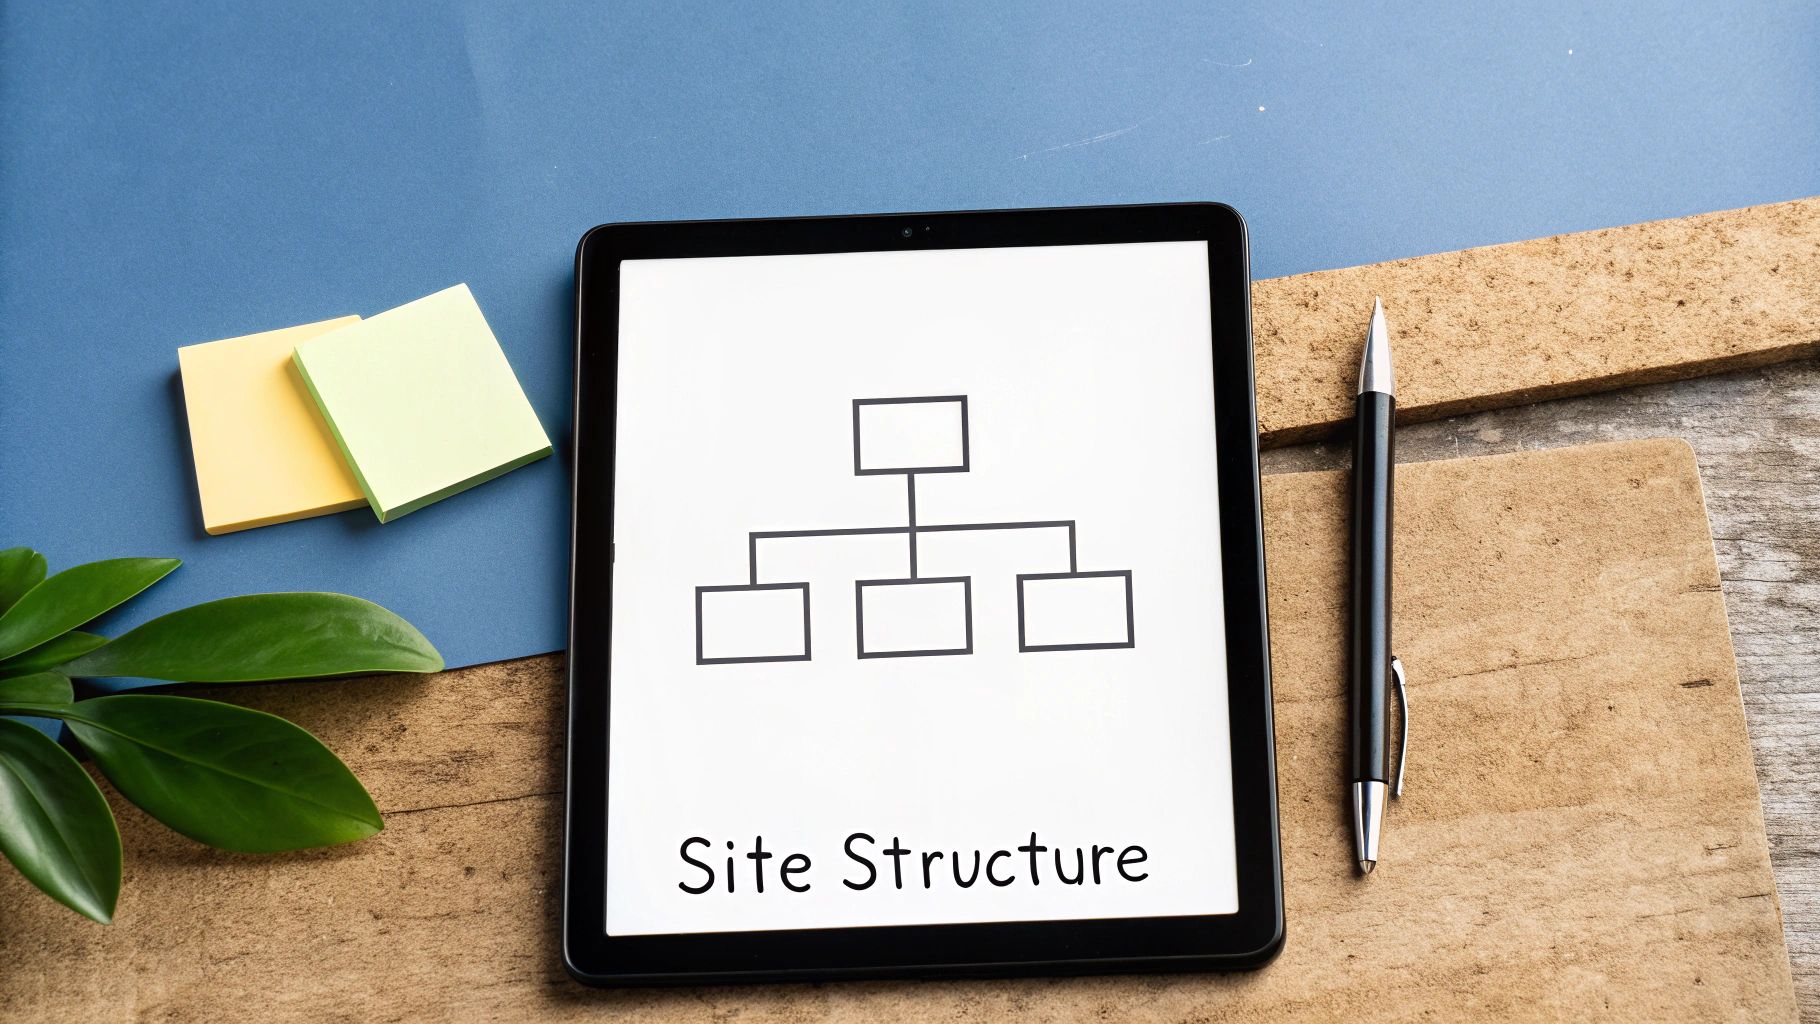
4. Plan Information Architecture and Site Structure
A successful website redesign is built on a logical foundation. Information Architecture (IA) is the art and science of organizing your website's content and functionality in a way that is intuitive for users. A well-planned site structure reduces cognitive load, improves navigation, and directly enhances both user satisfaction and conversion rates.
Neglecting IA is like designing a beautiful library with no Dewey Decimal System; visitors will quickly become frustrated and leave. The goal is to create a clear, predictable path for users to find what they need, aligning your site's layout with their mental models and expectations. This critical step in your website redesign checklist ensures your new design is as functional as it is visually appealing.
Key Actions for Building Your IA
To create a structure that serves both users and search engines, focus on these practical steps:
- User-Centric Research: Begin with card sorting exercises, where real users group your content topics into categories that make sense to them. This user-driven approach ensures your navigation reflects customer thinking, not just internal company jargon.
- Visualize the Structure: Before a single design element is created, map everything out. Develop a sitemap to outline the hierarchy of all pages and create low-fidelity wireframes to plan the layout of key templates. This blueprint prevents costly structural changes later in the development process.
- Navigation and Usability Best Practices: Aim for a shallow navigation structure, keeping essential information no more than 2-3 clicks deep from the homepage. Implement breadcrumb navigation to help users understand their location within the site hierarchy and use consistent, clear terminology across all menus and links to avoid confusion.
5. Establish Design System and Style Guide
To prevent design inconsistencies and streamline development, creating a formal design system and style guide is a non-negotiable step in your website redesign checklist. This is the single source of truth for your entire visual and interactive language, documenting everything from color palettes and typography to button styles and component behaviors. It ensures that every new page and feature feels cohesive and on-brand.
Ignoring this step often leads to a "Frankenstein" website where different sections look and feel disconnected. It also slows down development, as designers and engineers constantly have to reinvent the wheel for common elements. A well-documented system accelerates the entire process, enforces brand consistency, and makes future updates significantly more efficient.

Key Areas for Your Design System
A robust design system serves as both a library for developers and a rulebook for designers. Focus on these core pillars:
- Brand & Visual Identity: Define your core visual elements first. This includes your primary and secondary color palettes, typographic scales for headings and body text, and rules for logo usage. For those starting from scratch, you can discover more about how to create a strong brand identity that resonates with your audience.
- Component Library: This is a collection of reusable UI elements. Start with foundational components like buttons, form inputs, and navigation links. Progress to more complex components like cards, modals, and headers, providing clear usage guidelines and code snippets for each.
- Guidelines & Principles: Document the "why" behind your design choices. Include spacing rules (the 8-point grid is a common standard), accessibility guidelines for color contrast and focus states, and principles for motion and interaction. This ensures everyone understands the intent behind the system.
By establishing this framework early, you empower your team to build faster and more consistently. A great design system, like Google's Material Design or Shopify's Polaris, evolves with your brand and becomes an invaluable asset for scaling your digital presence.
6. Design and Prototype User Flows and Wireframes
Before a single line of code is written or a pixel is colored, you must create a blueprint for your new website. Designing wireframes and prototyping user flows is the architectural phase of your website redesign checklist, where you map out the structure, layout, and user journey. This step translates your strategy and information architecture into a tangible, visual plan.
Skipping this stage is like asking a construction crew to build a house without architectural drawings. It leads to scope creep, endless revisions, usability nightmares, and a final product that doesn't meet user needs or business goals. Wireframing ensures that the focus remains on functionality and user experience before aesthetics enter the picture, saving immense time and resources down the line.
Key Areas for Wireframing and Prototyping
To build a solid foundation, your design process should move from low-fidelity structure to high-fidelity interaction:
- Low-Fidelity Wireframing: Start with simple, grayscale block diagrams. Use tools like Balsamiq or even pen and paper to focus exclusively on layout, information hierarchy, and the placement of key elements like calls-to-action and forms. For example, Dropbox famously used simple wireframes to validate its user onboarding flow, ensuring it was intuitive before investing in detailed design.
- User Flow Mapping & Prototyping: Connect your wireframes to create interactive, clickable prototypes using tools like Figma or Adobe XD. This allows you to simulate critical user journeys, such as the checkout process or a sign-up sequence. Testing these prototypes with a small group of users (5-8 is often enough) will uncover major usability issues early, preventing costly fixes during development.
- Stakeholder Alignment & Developer Handoff: Share interactive prototypes with all stakeholders to get unified buy-in on the user experience. Involve your developers at this stage to identify any technical constraints or feasibility issues. Annotate your final wireframes clearly to explain interaction logic and edge cases, ensuring a smooth transition to the development phase.
By meticulously wireframing and prototyping, you validate your design concepts with real users and align your entire team around a shared vision, ensuring the final website is both functional and user-centric.
7. Conduct User Testing and Validation
Designing in a vacuum is one of the costliest mistakes you can make in a website redesign. User testing and validation is the critical process of putting your wireframes, mockups, and prototypes in front of real users to observe their interactions and gather direct feedback. This step bridges the gap between your design assumptions and actual user behavior, allowing you to identify and fix usability issues before a single line of code is written.
Failing to validate your designs is like launching a product without ever asking if anyone wants it. You risk investing significant time and budget into building a website that confuses, frustrates, or simply fails to meet user needs. The core goal is to test early and often, ensuring your design decisions are guided by user evidence, not internal opinions.
Key Areas for Your Testing
To get the most value from your efforts, focus your validation on several key stages and methods:
- Prototype Testing: Use tools like Figma or Maze to create interactive prototypes. Give users specific tasks to complete, such as "Find the pricing page and choose a plan" or "Add a product to your cart." This uncovers navigational problems and friction in key user flows.
- A/B Testing: Once you have a live staging site, you can A/B test critical design elements. For example, test two different versions of a call-to-action button (color, text, placement) to see which one converts better. This data-driven approach removes guesswork from optimization.
- Accessibility Audits: Go beyond standard usability by including users with diverse abilities. Testing with screen readers, keyboard-only navigation, and other assistive technologies ensures your redesign is inclusive and compliant. Microsoft's commitment to testing with users of all abilities is a prime example of building for everyone.
By integrating user feedback directly into the design cycle, you transform your website redesign checklist from a set of tasks into a user-centered process. This approach significantly de-risks the project, increases the likelihood of a successful launch, and builds a final product that truly serves its intended audience.
8. Optimize for Performance, SEO, and Accessibility
A visually stunning website is ineffective if it’s slow, invisible to search engines, or unusable for people with disabilities. Optimizing for performance, technical SEO, and accessibility is a non-negotiable step in any modern website redesign checklist. These three pillars work together to deliver a superior user experience, expand your audience reach, and directly impact your bottom line.
Neglecting these technical foundations can sabotage your launch from day one. A slow-loading site will frustrate users and harm your search rankings, as Google heavily weights Core Web Vitals. Poor accessibility not only alienates a significant portion of the population but can also expose your business to legal risks. This step ensures your new design is built on a robust, inclusive, and high-performing technical framework.
Key Areas for Your Optimization
To build a site that is fast, findable, and functional for everyone, your technical optimization should focus on several critical areas:
- Performance & Core Web Vitals: Go beyond basic speed tests. Aim for Lighthouse scores of 90+ across all categories. Implement modern performance techniques like lazy loading for images and videos, using a Content Delivery Network (CDN) for static assets, and optimizing image files. For a deeper dive into improving your site's speed, you can learn how to optimize website performance and delight your users.
- Technical SEO: While your content strategy handles on-page SEO, the redesign must ensure the technical backend is flawless. This includes creating a clean XML sitemap, ensuring mobile-friendliness, implementing a logical heading structure (H1, H2, H3), and using structured data (Schema markup) to help search engines understand your content.
- Web Accessibility (WCAG): Compliance is not just a checkbox; it's a commitment to inclusivity. Your goal should be to meet Web Content Accessibility Guidelines (WCAG) 2.1 AA standards at a minimum. Use automated tools like WAVE or Axe to catch initial issues, but also conduct manual testing. This includes navigating the site using only a keyboard and testing it with screen readers like JAWS or NVDA to simulate the experience of users with visual impairments.
9. Plan Migration Strategy and Content Updates
A successful redesign is not just about a new look; it's about a seamless transition that preserves your hard-earned SEO authority and user trust. A meticulous migration strategy is the critical step that connects your old website to your new one without dropping the ball. This process involves mapping every old URL to its new counterpart, ensuring users and search engines are correctly redirected after launch.
Failing to plan this transition is one of the most catastrophic mistakes in a website redesign checklist. It can lead to a sudden and severe drop in organic traffic, a surge in "404 Not Found" errors, and a frustrating user experience that undoes all your design efforts. The objective is to create a detailed blueprint for moving content, managing URL changes, and updating internal links to ensure a smooth handover.
Key Areas for Your Migration Plan
To avoid post-launch chaos, your migration strategy should be comprehensive and tested well before you go live:
- URL Mapping & Redirects: The core of your strategy is a URL map. Create a spreadsheet listing every URL from your old site in one column and its corresponding new URL in another. For pages that are being removed, decide where to redirect them (e.g., to a parent category or the homepage). Implement 301 redirects for all permanent changes to pass link equity.
- Content Inventory & Updates: This is the perfect time to audit and refresh your content. Identify pages that need to be rewritten, updated, or consolidated. For large-scale projects like HubSpot’s knowledge base migration, this involves mapping thousands of articles to a new information architecture and updating internal links across the entire library.
- Technical SEO Transition: Once the new site is live, your work isn't done. You must submit your new XML sitemap to Google Search Console and Bing Webmaster Tools to encourage crawling of the new URLs. It is also crucial to closely monitor your 404 error logs post-launch to catch and fix any missed redirects immediately.
10. Execute Launch, Monitor, and Iterate
The culmination of your hard work arrives at the launch, but this is a beginning, not an end. A successful launch is a carefully orchestrated event that prioritizes stability, immediate issue resolution, and a commitment to continuous improvement. It’s the transition from a development project to a live, evolving business asset.
Failing to plan the launch phase meticulously can undo months of great work. A chaotic deployment can lead to downtime, lost revenue, and a damaged brand reputation. The goal is to execute a smooth transition, have a dedicated team ready to monitor performance in real-time, and possess the agility to respond to issues and user feedback immediately. This final step in the initial website redesign checklist is what separates a good redesign from a great one.
Key Areas for Your Launch Plan
To ensure a controlled and successful deployment, your launch strategy should be comprehensive and rehearsed:
- Phased Rollout & Monitoring: Instead of a risky "big bang" launch, consider a phased rollout. For example, you could initially launch the new design to a small percentage of users, like 10%, to gather feedback and monitor for unforeseen bugs. Set up a real-time dashboard displaying key metrics like server response time, error rates, and conversion rates to watch closely during the launch window.
- Communication & Rollback Plan: Before going live, brief all key teams, especially customer support and sales, on the changes and potential talking points. Crucially, have a documented and tested rollback plan. This plan should detail the exact steps needed to revert to the old site if a critical, unfixable issue arises, ensuring business continuity.
- Post-Launch Iteration: The launch is day one for optimization. Immediately begin collecting user feedback through surveys or feedback widgets. Schedule a post-launch retrospective with your team to document what went well and what could be improved. Use these learnings to build an optimization roadmap for the next 6 to 12 months, ensuring your new website continuously evolves to meet user needs.
10-Point Website Redesign Checklist Comparison
| Item | 🔄 Implementation complexity | ⚡ Resource requirements & speed | ⭐ Expected outcomes / 📊 Impact | Ideal use cases | 💡 Key advantages / tips |
|---|---|---|---|---|---|
| Conduct a Comprehensive Website Audit | High 🔄🔄🔄 — time‑consuming, technical | Analytics + technical experts; tools (GA, Hotjar, Screaming Frog); 2–4 weeks | ⭐ Baseline metrics; 📊 prioritized fixes and ROI estimates | Pre-redesign; diagnose performance/UX problems | 💡 Data-driven priorities; reveal quick wins; document findings |
| Define Clear Goals and KPIs | Medium 🔄🔄 — planning & alignment | Stakeholders, product/analytics input; workshop sessions | ⭐ Clear success criteria; 📊 measurable targets (conversions, engagement) | Project kickoff; justify investment and scope | 💡 Use SMART goals; involve stakeholders; set short & long term KPIs |
| Understand Your Target Audience and User Personas | High 🔄🔄🔄 — research intensive | UX researchers, interviews/surveys, analytics; tools (Typeform, user interviews) | ⭐ User-centered decisions; 📊 fewer redesign iterations, improved retention | Redesigns targeting new or diverse audiences | 💡 Build 3–5 personas; validate with data; update regularly |
| Plan Information Architecture and Site Structure | High 🔄🔄🔄 — strategic planning | UX designers, card sorting, IA tools (Optimal Workshop, Figma) | ⭐ Improved findability; 📊 reduced bounce, better SEO | Large content sites, e-commerce catalogs | 💡 Keep nav 2–3 levels; test IA with users; use consistent terminology |
| Establish Design System and Style Guide | High 🔄🔄🔄 — upfront investment | Designers + devs, Figma/Storybook; documentation effort | ⭐ Visual consistency; 📊 faster development, fewer design decisions | Multi-team products; long-term scalable projects | 💡 Start with core components; version control; enforce governance |
| Design and Prototype User Flows and Wireframes | Medium 🔄🔄 — iterative | Designers, prototyping tools (Figma, XD); testing time | ⭐ Validated flows; 📊 reduced dev rework and clearer specs | Critical journeys (checkout, onboarding) | 💡 Use grayscale early; test with 5–8 users; involve developers early |
| Conduct User Testing and Validation | Medium‑High 🔄🔄🔄 — scheduling & analysis | Moderators, participants, tools (UserTesting, Zoom); compensation/time | ⭐ Usability issues uncovered; 📊 evidence for design decisions | Before development; validating prototypes or A/B tests | 💡 Test multiple rounds; include diverse users; record sessions |
| Optimize for Performance, SEO, and Accessibility | High 🔄🔄🔄 — technical and ongoing | Devs/SEO specialists, Lighthouse, Axe, SEMrush; continuous work | ⭐ Faster, accessible site; 📊 higher rankings & conversions | Public-facing/high-traffic sites; legal compliance needs | 💡 Aim Lighthouse 90+; use CDN, lazy load; run manual & automated audits |
| Plan Migration Strategy and Content Updates | High 🔄🔄🔄 — meticulous execution | SEO + dev + content teams; tools (Screaming Frog, GSC); detailed mapping | ⭐ Preserved search rankings; 📊 minimal traffic loss at launch | URL changes, large CMS migrations, domain moves | 💡 Create URL map; test redirects; monitor 404s post-launch |
| Execute Launch, Monitor, and Iterate | Medium‑High 🔄🔄🔄 — coordination peak | Cross-functional ops, monitoring dashboards, incident plan | ⭐ Smooth rollout; 📊 rapid issue detection and continuous improvements | Go-live events, phased rollouts, major releases | 💡 Have rollback plan; real-time monitoring; commit to 6–12 months iteration |
Your Redesign is a Beginning, Not an End
Navigating the complexities of a website overhaul is a monumental task. From the initial spark of an idea to the final launch, you’ve meticulously planned, designed, and developed a new digital home for your brand. Following a comprehensive website redesign checklist like this one doesn't just prevent costly mistakes; it transforms the entire process from a reactive scramble into a proactive, strategic initiative. You’ve moved beyond simply "making it look better" and have laid the groundwork for a platform that actively works to achieve your business objectives.
The journey you’ve embarked on-auditing your existing assets, defining clear goals, mapping user journeys, and structuring your content-is the bedrock of digital success. Each step was a deliberate choice aimed at enhancing user experience, boosting search engine visibility, and ultimately, driving conversions. This checklist serves as your roadmap, ensuring that no critical element is overlooked, from the high-level information architecture down to the granular details of 301 redirects and accessibility compliance.
From Checklist to Continuous Improvement
The true power of this process, however, isn't in checking off the final box. The launch of your new website isn’t the finish line; it’s the starting line for a new race. The real value is unlocked in the post-launch phase, where your strategic preparations meet real-world user behavior. Your new site is now a living, breathing entity-a powerful tool for gathering data, testing hypotheses, and making informed decisions.
Think of your redesigned website as a dynamic platform for growth. The KPIs you established in the beginning are now your North Star metrics. The analytics and tracking tools you implemented are your eyes and ears, revealing what resonates with your audience and where friction still exists. This is where the iterative cycle of improvement begins.
Key Takeaway: A website redesign is not a one-time project but the first step in an ongoing cycle of optimization. Your goal should be to create a system for continuous improvement, not just a static digital brochure.
Actionable Next Steps: Embracing the Iterative Mindset
With your new site live, your focus must shift from project management to performance management. Mastering this transition is what separates successful digital brands from those that stagnate. Here are the most critical actions to take now that your checklist is complete:
- Monitor and Analyze: Dive deep into your analytics daily for the first few weeks. Pay close attention to your primary KPIs: conversion rates, bounce rates, time on page, and goal completions. Are there any unexpected drops or spikes in traffic to specific pages?
- Gather User Feedback: Don't assume you know what your users think. Implement tools like heatmaps, session recordings, and on-site surveys to gather qualitative feedback. This data provides the "why" behind the "what" you see in your analytics.
- Create an Optimization Roadmap: Based on your analysis and user feedback, build a prioritized list of A/B tests and improvements. Perhaps a call-to-action button isn't performing as expected, or a key landing page has a high exit rate. Address these issues systematically, one test at a time.
- Stay Agile: The digital landscape is constantly evolving. What works today may not work tomorrow. By adopting an iterative mindset, you empower your business to adapt to new technologies, changing user expectations, and shifting market trends without needing another massive overhaul in two years.
Ultimately, a successful website redesign equips you with a superior tool. It's faster, more intuitive, more accessible, and perfectly aligned with your business goals. By treating your launch as the beginning of a new chapter of data-driven refinement, you ensure that this significant investment continues to deliver compounding returns, solidifying your digital presence and driving sustainable growth for years to come.
Feeling overwhelmed by the scope of a redesign or the ongoing commitment to optimization? You don't have to do it alone. The team at Sugar Pixels specializes in managing the entire website redesign process, from strategic planning to post-launch support, ensuring your new site is a powerful engine for growth. Let's build a website that works as hard as you do.