
So, you’ve built your website. Now what? Getting it online for the world to see involves a few key steps: choosing your web address, finding it a home on the internet, and then pushing your files live. It’s a process I’ve walked countless clients through, and it’s simpler than it sounds.
Let’s break down how to get your site from your computer to the public internet.
Building Your Website's Foundation
Before your website can welcome its first visitor, it needs two things: an address (your domain name) and a plot of land to build on (your web hosting). Getting these two foundational pieces right is crucial. It’s not just a technical box to check; it’s the bedrock of your entire online presence.
Your choices here will directly impact your site's speed, security, and how well it can grow with you. Think of your domain as the sign above your shop door—it needs to be memorable and tell people who you are. The hosting is the building itself—it needs to be solid, secure, and big enough for your needs.
This simple diagram shows how these two essential pieces connect to form your website's base.
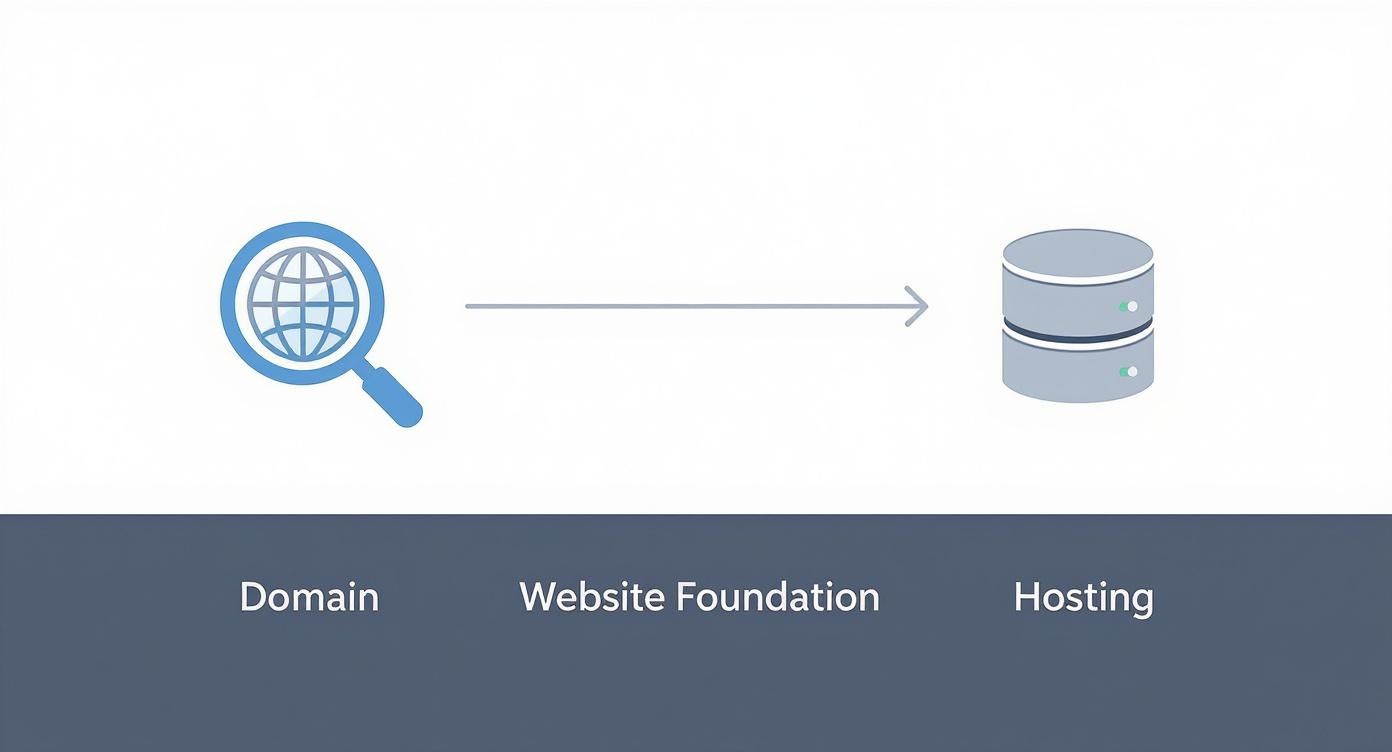
As you can see, locking in your domain and sorting out your hosting are the first, interconnected steps you'll take.
Choosing a Memorable Domain Name
Your domain isn't just a technical address; it’s the core of your online brand. A great one is short, catchy, and easy to remember. I always advise clients to avoid hyphens or numbers if they can—they’re just a hassle to type and say out loud.
When you're brainstorming, keep these tips in mind:
- Keep it simple. If you have to spell it out over the phone, it’s too complicated.
- Stick with .com. It’s the gold standard for a reason. While other extensions are fine, .com still carries the most trust and recognition.
- Do your homework. Before you buy, check if the name is already trademarked or heavily used on social media. You want to avoid any brand confusion down the road.
If you’re new to this, it’s worth understanding domain name registration and what it really means to own a domain. It's a small bit of reading that can save you headaches later.
Selecting the Right Web Hosting
Web hosting is essentially renting space on a server where your website's files will live, making them accessible to anyone with an internet connection. The hosting you pick has a massive impact on your site’s performance, reliability, and how much traffic it can handle.
The digital publishing market, which covers these services, has exploded, growing from $52.61 billion in 2024 to an estimated $58.73 billion in 2025. Why? Because as of early 2025, there are 5.56 billion people online—that's 67.9% of the world's population. This ever-growing audience is why getting your website online is such a huge opportunity. You can dive deeper into these numbers in the full 2025 Global Overview Report.
Choosing the right hosting isn't about getting the most powerful option; it's about matching the server resources to your specific needs. A simple portfolio site doesn't require the same horsepower as a high-traffic e-commerce store.
To help you decide, let's look at the most common options you'll come across.
Hosting Options Compared for Your First Website
Navigating the world of web hosting can feel overwhelming at first. To simplify things, here’s a quick breakdown of the most common types, what they’re good for, and what you can expect to pay.
| Hosting Type | Best For | Average Cost (Monthly) | Technical Skill Level |
|---|---|---|---|
| Shared Hosting | New blogs, portfolios, small business sites with low traffic. | $2 – $15 | Beginner |
| VPS Hosting | Growing businesses, e-commerce stores, sites with moderate traffic. | $20 – $80 | Intermediate |
| Cloud Hosting | High-traffic sites, applications, and businesses needing high uptime. | $40 – $250+ | Intermediate to Advanced |
Ultimately, the best choice depends on your project's specific needs and your comfort level with the technical side of things. Don't overbuy, but give yourself a little room to grow.
And while this guide is focused on the publishing part, if you're still in the early stages, our complete guide on how to build a website will walk you through the entire creation process from scratch.
Alright, you've got your domain name and hosting plan sorted. Now for the fun part: getting your actual website files ready to go live. This isn't just a matter of dragging a folder onto a server; how you prepare everything now has a massive impact on your site's performance and stability down the road.
The process looks a little different depending on what you've built. A simple static site has different needs than a complex WordPress build or an e-commerce store.
Think of this as your pre-flight check. Spending a little extra time here will save you from the classic launch-day headaches that trip up so many people.

Prepping a Static HTML and CSS Site
If you coded your site from the ground up with HTML, CSS, and maybe a little JavaScript, your biggest job is organization. A clean, logical file structure isn't just good practice—it's essential.
Before you even think about uploading, get your assets organized into dedicated folders:
/cssfor all your stylesheets/jsfor your JavaScript files/imagesfor all your graphics and photos
More importantly, you need to hunt down all your internal links and image paths. Make sure every single one is relative (like <img src="/images/logo.png">) and not absolute (like <img src="C:/Users/YourName/Desktop/website/images/logo.png">). Those absolute paths work fine on your local machine, but they will completely break the moment your site is on a live server, leaving you with a page full of broken images.
Getting Your WordPress Site Ready
For anyone using WordPress, the prep work is less about file structure and all about the backup. I can't stress this enough: creating a complete backup is the single most important thing you'll do before moving your site.
A full backup has two critical parts: your website files (themes, plugins, uploads) and the database (which holds all your posts, pages, and settings).
Thankfully, plugins like UpdraftPlus or All-in-One WP Migration make this incredibly easy. They bundle your entire site into one neat package, which makes the whole migration process a breeze. Don't be tempted to skip this—a corrupted database during the transfer can wipe out everything you've built.
Pro Tip: A backup is only good if you know it works. Always test your backup file by restoring it on a local computer or a temporary staging site before you attempt to move it to your final destination.
Finalizing an E-commerce Store
If you're launching an online store on a platform like Shopify or with WooCommerce, your pre-launch checklist is much more about operations than files. Your product pages are probably already in place, so your attention needs to shift to the nitty-gritty business settings. This is your last chance to iron out the details for a smooth customer experience.
Run through this list right before you go live:
- Payment Gateways: Can you actually take people's money? Run a real test transaction to be sure.
- Shipping Rules: Are your shipping zones and rates configured correctly for every region you sell to? A mistake here can kill your profit margins.
- Product Details: Proofread every description one last time. Double-check that all prices are right and that your inventory numbers are accurate.
Something as small as a broken payment link or an incorrect shipping rate can cost you sales and hurt your reputation right out of the gate.
Essential Pre-Launch Optimizations
No matter what kind of site you're launching, there are a couple of last-minute optimizations that are absolutely crucial for performance. Site speed is everything. It dictates user experience and plays a huge role in your SEO. A slow site will have a higher bounce rate and will struggle to rank well in search results.
First, optimize your images. Huge, uncompressed image files are one of the biggest culprits of slow load times. Use a tool like TinyPNG or an image optimization plugin to shrink those file sizes without losing visual quality.
Second, minify your code. Minification is a process that automatically removes all the unnecessary characters from your code—things like extra spaces, line breaks, and comments. This makes your HTML, CSS, and JavaScript files smaller, so they download and load faster in a visitor's browser. Many caching plugins and modern development tools can handle this for you automatically. These small tweaks make a massive difference.
Alright, you've got your website files prepped and ready to go. Now for the exciting part: getting them from your computer onto the live server so the world can see your work.
Think of it as moving into a new storefront. How you get everything set up will define your workflow for every update you make down the line. The right method for you really depends on what kind of site you've built, how comfortable you are with the tech side of things, and how often you'll be making changes.
Let's walk through the most common ways to do this, from the classic drag-and-drop approach to the slick, automated systems developers love.
The Classic: FTP and cPanel
For years, the standard way to upload a website has been with a File Transfer Protocol (FTP) client. Don't let the name intimidate you. An FTP client is basically just a program that creates a direct bridge between your computer and your web host's server, letting you drag and drop files just like you would between folders on your desktop.
This method has come a long way. Back in the early 1990s, when there were fewer than 100 websites in existence, getting a site online was a hardcore technical task handled almost entirely through command-line FTP. Today's tools make it a breeze.
To get started, you just need two things:
- An FTP client. FileZilla is a fantastic, free, and popular choice.
- Your FTP login details from your web host—this includes the server address, your username, and your password.
Once you connect, you'll see your computer's files on one side and the server's folders on the other. The key is to drag your website files into the correct destination folder on the server, which is almost always called public_html or www.
Putting your files in the wrong server directory is one of the most common mistakes people make. If your site isn't showing up, double-check that your files are in
public_html. When in doubt, your host’s help docs will point you in the right direction.
Many hosts also offer an even easier alternative: the File Manager tool built right into their control panel (like cPanel). It works directly in your browser, so you can upload files—or even a whole .zip archive—without installing any extra software. It's perfect for quick, one-off uploads.
Modern Workflows: Git-Based Deployment
If you're a developer or just a bit more technically inclined, a workflow built around Git is the way to go. Git is a system that tracks every single change you make to your code. When you use it with a service like GitHub, you can set up a slick, automated deployment process.
This is often called Continuous Integration/Continuous Deployment (CI/CD), and it completely changes the game. Instead of manually uploading files every time you fix a typo or add a feature, you just "push" your changes to your Git repository.
That's it.
Services like Netlify, Vercel, or GitHub Pages are built for this. They watch your repository for changes, and the moment they see one, they automatically grab the new code, rebuild your site, and push it live—all in a few seconds.
This approach has some huge benefits:
- It’s automated. No more manual file transfers means no more "oops, I forgot to upload that one file" errors.
- You have a safety net. Git keeps a full history of every change, so if you break something, you can roll back to a previous working version in seconds.
- It’s incredibly fast. You can push an update and see it live on your site almost instantly.
This is hands-down the best way to manage modern static sites and frontend projects. If you plan to update your site regularly, learning this workflow is a time investment that will pay for itself over and over again.
To give you a clearer picture, here’s a quick breakdown of the different deployment methods.
Deployment Method Quick Reference
| Deployment Method | Ideal User | Key Advantage |
|---|---|---|
| FTP Client (FileZilla) | Beginners, simple sites | Visual drag-and-drop interface, easy to learn. |
| cPanel File Manager | Quick one-off uploads | No extra software needed, works in your browser. |
| Git-based (Netlify, Vercel) | Developers, frequent updates | Fully automated, version control, super fast. |
| Managed Hosting | Business owners, non-techies | "One-click" process, completely hands-off. |
Each of these methods is a solid choice, but picking the right one from the start will make managing your site so much easier in the long run.
One-Click WordPress Deployments
Using a managed WordPress host? You're in luck, because your deployment process is often the simplest of all. These hosts are WordPress specialists, and they've built their platforms to make going live completely painless. The type of hosting you have makes a huge difference here, which is something we cover in our guide on how to choose the right web hosting.
Most managed hosts provide "one-click" staging environments. This lets you build and test your entire site in a private, password-protected space. When everything looks perfect and you’re ready to launch, you just click a button.
The host takes it from there. They handle moving all the files, migrating the database, and updating all the necessary configurations to make the site live. This eliminates almost all the technical work and risk, making it the perfect option for anyone who’d rather focus on their business than their server. For specific guides, you can always check a platform's own help files, like the mustangwpo documentation.
Connecting Your Domain and Securing Your Site
Okay, so your website files are now sitting comfortably on a server somewhere. But there's a crucial piece missing. If someone types your domain name into their browser right now, they'll get… nothing. Your domain and your hosting server are like two people at a party who haven't been introduced yet.
That introduction is handled by the Domain Name System (DNS). Think of it as the internet's master contact list. It translates your human-friendly domain name (like yourcoolbusiness.com) into the server's numerical IP address. You just need to tell your domain where to find your server.
While you're at it, you absolutely must secure the connection with an SSL certificate. This is what turns http into https and puts that reassuring little padlock in the browser's address bar. It's not optional anymore; it's a fundamental sign of a trustworthy, professional website.

Making the Connection: Pointing Your Domain to Your Host
To get this done, you'll need to log into the place where you purchased your domain name—your domain registrar, which might be somewhere like GoDaddy or Namecheap. Once you're in, look for a section called "DNS Management" or something similar. You've got a couple of ways to make the connection.
The most common and straightforward way is by changing the Nameservers. Your web host will give you two or more nameserver addresses (they look something like ns1.yourhost.com and ns2.yourhost.com). You simply copy those from your hosting provider and paste them into the nameserver fields at your domain registrar, replacing whatever was there by default. This move effectively hands over the directional duties to your web host.
A more surgical approach involves editing individual DNS records, specifically the A Record. This points your domain name directly to your server’s unique IP address. It offers a bit more control but is generally for more advanced use cases. For most people, changing the nameservers is the way to go.
A word of warning: be patient. These changes aren't instant. The update has to spread across the internet in a process called propagation. This can be as quick as 30 minutes, but it can sometimes take up to 48 hours. Don't panic if your site doesn't show up right away.
Flipping the Switch on HTTPS with an SSL Certificate
Once your domain and hosting are talking to each other, it's time to lock things down with that SSL certificate. This is a non-negotiable step in 2024. Browsers like Chrome will flag any site without one as “Not Secure,” which is the digital equivalent of a "Keep Out" sign for your visitors. Plus, Google factors HTTPS into its search rankings, so it's a win for your SEO.
A GlobalSign study found that 85% of online shoppers will flat-out avoid an unsecured website. That padlock isn't just a technicality; it's a powerful trust signal that directly impacts your credibility and sales.
Thankfully, this used to be a complicated and expensive process, but not anymore. Most quality hosts now provide a free SSL certificate from Let's Encrypt, and activating it is often as simple as clicking a button in your control panel.
Here's a quick breakdown of your SSL options:
| SSL Type | Cost | Best For | How to Get It |
|---|---|---|---|
| Free SSL (Let's Encrypt) | Free | Blogs, portfolios, small business sites | Usually a one-click install in your hosting panel. |
| Paid SSL (Domain Validated) | ~$10 – $100/year | E-commerce stores, sites with user logins | Purchase through your host or a third party. |
| Paid SSL (Extended Validation) | ~$100 – $500+/year | Large companies, banks, financial institutions | A more detailed business verification is required. |
For a new business, startup, or e-commerce store, the free Let's Encrypt certificate is more than enough to get you started securely. Just navigate to the SSL/TLS section of your hosting dashboard, find your domain, and hit the install button. The system will take care of the rest.
With your domain connected and your site secured, you’re officially live on the web.
Your Essential Post-Launch Checklist
Alright, you did it. Your website is live! Hitting that "publish" button is a fantastic feeling, but the real work has just begun. These first few hours are absolutely critical for making sure everything works as it should and giving your visitors a great first impression.
Think of a post-launch check as your final quality-control sweep. It’s all about catching those small, easy-to-miss glitches before your audience does. This is your chance to make sure all that hard work translates into a polished, professional experience right out of the gate.
First Impressions and Functionality Checks
Your first priority is to put yourself in your visitor's shoes. Don't just admire your work—interact with it. Click on everything. Every link, every button, every menu item. Make sure they all go where they're supposed to. A broken link is more than just an error; it's a dead end for users and a red flag for search engines.
Next, it's time to test every point of interaction:
- Contact Forms: Seriously, fill out every single form. Did the submission go through? Did you get the email notification? Was there a clear "thank you" message for the user?
- Email Subscription Boxes: Sign yourself up. Go through the entire flow, from entering your email to clicking the link in the confirmation message.
- E-commerce Carts: If you're running a store, this is a big one. Add a product to the cart, go through the entire checkout process, and run a small test transaction to confirm the payment gateway is working flawlessly.
A form that doesn't submit or a broken checkout is a surefire way to lose a customer. A few minutes of testing now can save you from a world of hurt later.
Verify Cross-Browser and Mobile Compatibility
Here’s a hard truth: the way your site looks on your screen is not how it will look for everyone else. People use different browsers and a huge range of devices, and your site needs to deliver a solid experience on all of them.
Pop open your new site in the major web browsers:
Keep a close eye on your layout, fonts, and how images are aligned. Something that looks pixel-perfect in Chrome could be a mess in Safari if you're not careful. After that, grab your phone and a tablet to test the mobile experience. Is the text readable without pinching and zooming? Are the buttons big enough for a thumb to tap easily? Mobile traffic often makes up more than half of all website visits, so a clunky mobile site just won't cut it.
Key Insight: Don't just shrink your desktop browser window to test for mobile. Use real devices or a tool like Chrome's built-in device simulator. This gives you a much more accurate picture of touch functionality and real-world performance.
Setting Up Analytics and Search Console
You can't improve what you don't measure. Getting your analytics set up is the first step to understanding who your visitors are and what they're doing on your site. Google Analytics is the undisputed king here, and it’s completely free.
All it takes is adding a small snippet of tracking code to your site. Once it’s active, you’ll start seeing invaluable data:
- How many people are visiting
- Where they’re coming from (e.g., Google search, social media, direct links)
- Which pages they spend the most time on
This data is the foundation for making smart decisions about your site's future. The web is a massive place; by early 2025, an estimated 67.9% of the world's population was online. As digital ad spending continues to climb—social media ads alone grew by 11.7% over two years—having your own platform to build an audience is more important than ever. You can dive into more insights in the latest digital publishing report.
Once analytics is humming along, your next stop is Google Search Console. This free tool is your direct line to Google. It helps you monitor your site's health in search results, find crawling errors, and see what keywords people are using to find you.
The single most important thing to do here is submit your sitemap. A sitemap is basically a road map of your website that helps Google discover and index all your important pages. Submitting it can give you a real head start on getting your content to show up in search results.
This post-launch blitz is just the start. To keep your site running smoothly for the long haul, take a look at our comprehensive website maintenance checklist. It’s packed with tips to keep your site secure, updated, and performing its best.
Still Have Questions? Let’s Clear Up a Few Things

Hitting the “publish” button feels great, but it often opens up a new set of questions. It's completely normal. I've walked countless clients through these final hurdles, and knowing what to expect can save you a ton of stress.
Let's dig into some of the most common questions that pop up right after a website goes live, from DNS mysteries to the all-important Google timeline.
How Long Until My Website Shows Up on Google?
This is the big one, and the honest answer is: it depends. After you launch, it can take anywhere from a few days to several weeks for Google to find, crawl, and finally index your new site. You're not just waiting for someone to flip a switch; you’re waiting for Google’s web crawlers to discover you exist.
Want to give them a nudge? The single best thing you can do is submit your sitemap directly through Google Search Console. Think of it as sending Google a direct invitation with a map to all your pages. This simple step can shave a lot of time off the waiting game.
What if My Website Isn't Loading After I Launched It?
So you've launched, waited a bit, and… nothing. Before you panic, let's run through a quick diagnostic. The most frequent issue by far is a DNS propagation delay. It can take up to 48 hours for your new DNS settings to fully ripple across the internet. Often, the only fix you need is a little patience.
If you’re past the two-day mark and still staring at an error page, it's time to investigate.
- Check Your Nameservers: Did you copy the nameservers from your host to your domain registrar exactly? A tiny typo here is a common showstopper.
- Look at Your File Path: Make sure you uploaded your site’s files to the right directory. On most servers, this will be
public_htmlorwww. - Verify Your Homepage File: Your main page needs a specific name so browsers can find it. It's almost always
index.htmlorindex.php.
Can I Make Changes After My Website Is Published?
Yes, absolutely! A website is a living thing, not a stone tablet. Publishing is just version 1.0. You can—and definitely should—update content, add new pages, and tweak your design as your business grows.
Making those changes is usually straightforward:
- WordPress: Just log into your admin dashboard, edit the page or post, and hit the "Update" button.
- Static Sites: You'll edit the files on your own computer, then simply re-upload the modified files using FTP or push the changes via Git.
Regular updates don't just keep your information current for visitors. They also send a strong signal to search engines that your site is active and relevant, which is a nice little boost for your SEO.
What’s the Difference Between a Post and a Page?
If you're using WordPress, this is a classic point of confusion. While they look similar on the front end, they're built for very different jobs.
Pages are for your core, "evergreen" content—the stuff that rarely changes. Think of your "About Us," "Services," or "Contact" pages. These are the pillars of your website and usually live in your main navigation menu.
Posts, on the other hand, are for timely, dynamic content like blog articles or company news. They're typically displayed in reverse chronological order and are designed to keep your audience engaged over time.
Ready to stop troubleshooting and start growing? At Sugar Pixels, we handle all the technical details of website design, hosting, and maintenance, so you can focus on your business. Let us build you a powerful, professional online presence. Learn more about our web design services and get started today!