A website migration, whether changing hosts, platforms, or domain names, represents a critical inflection point for any online presence. Executed flawlessly, it can catalyze growth through enhanced performance, superior user experience, and improved security. However, a poorly managed transition can have catastrophic consequences, leading to plummeting search engine rankings, broken functionality, and a significant loss of traffic and revenue. The margin for error is slim, and the stakes are incredibly high.
Success is not a matter of luck; it is the direct result of meticulous planning and systematic execution. This is where a definitive website migration checklist becomes an indispensable tool. It transforms a complex, multi-faceted project into a manageable, step-by-step process, ensuring no critical detail is overlooked. From the initial content audit and technical preparations to the final post-launch monitoring, a structured approach is the only way to safeguard your digital assets.
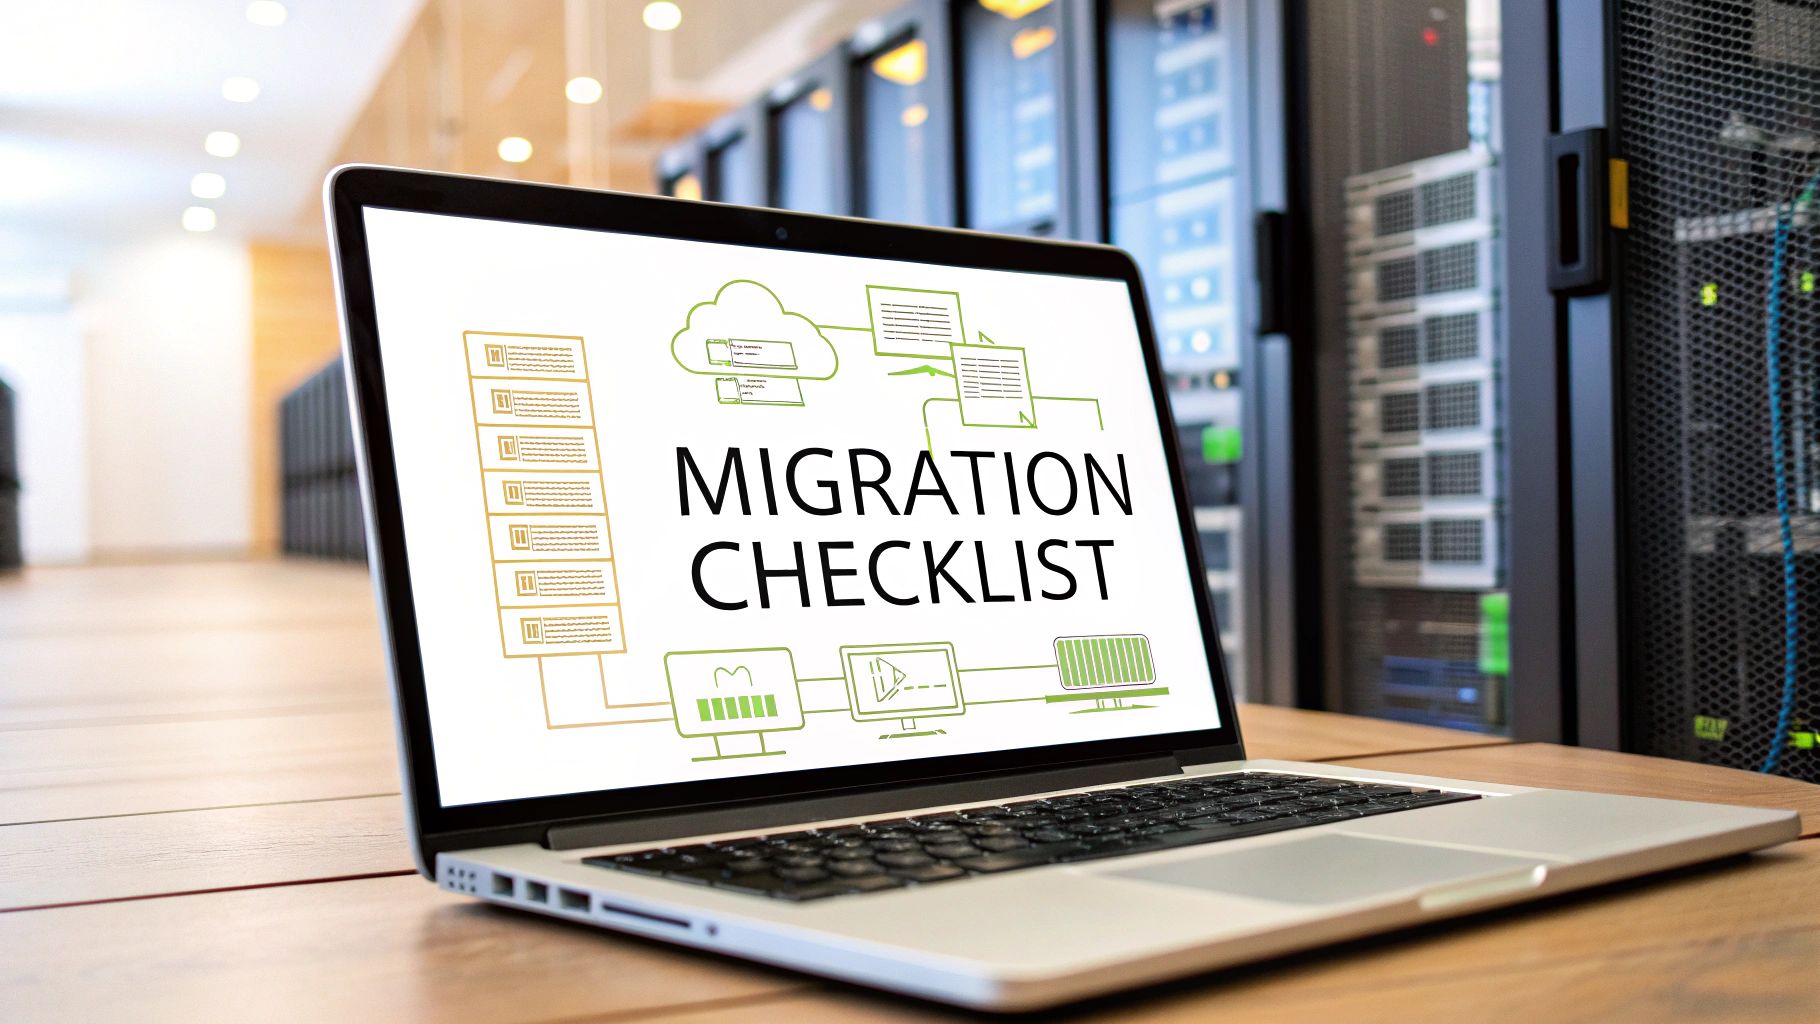
This comprehensive guide is designed to be your single source of truth for navigating this process. We will detail ten non-negotiable stages, providing actionable insights and practical examples for each. You will learn precisely how to:
- Audit and document your existing site to create a clear baseline.
- Map URLs and implement 301 redirects to preserve your hard-earned SEO authority.
- Thoroughly test every aspect of the new site in a staging environment before going live.
- Monitor performance and validate success after the cutover to address issues immediately.
Whether you're an e-commerce entrepreneur protecting your sales pipeline or a digital marketer safeguarding organic traffic, following this checklist will provide the structure needed for a seamless and successful migration. Let’s dive into the essential steps that will ensure your next digital move is a step forward, not a setback.
1. Audit and Document Current Website
The first, non-negotiable step in any successful website migration checklist is to conduct a comprehensive audit and create meticulous documentation of your current site. This process involves creating a complete inventory of your website's assets, from content and structure to technical configurations. Think of it as creating a detailed blueprint of your old house before you start building the new one. This baseline is critical for preventing content loss, SEO damage, and broken functionality during the transition.

This audit serves as your source of truth, ensuring every valuable page, piece of content, and technical setting is accounted for. For example, when TechCrunch migrated to a new publishing platform, their team had to audit over 100,000 articles to ensure a seamless transition of content and SEO value. Without this foundational audit, critical assets can be easily overlooked, leading to significant drops in traffic and revenue post-migration.
Why It's a Critical First Step
Skipping a thorough audit is like navigating without a map. It guarantees you will get lost. This initial inventory forms the backbone of your entire migration plan, informing your URL mapping, content strategy, and testing protocols. By documenting everything, you create a safety net that allows you to verify that all elements have been successfully moved to the new site and to quickly troubleshoot any issues that arise.
Actionable Tips for Your Audit
To execute a thorough audit, follow these practical steps:
- Crawl Your Website: Use tools like Screaming Frog or Sitebulb to crawl every URL. Export this data to a master spreadsheet. This is a crucial part of a technical SEO audit, which you can explore in more detail to understand its full scope. To get started, you can learn more about conducting an SEO audit.
- Document Key Elements: For each URL, record its meta title, meta description, H1 tags, word count, and current organic traffic.
- Inventory Assets: Catalog all images, videos, PDFs, and other media files. Note their file paths and sizes.
- Record Technical Details: Document your current
robots.txtfile, XML sitemaps, canonical tags, and any custom code or third-party integrations (like analytics scripts or marketing pixels). - Benchmark Performance: Export key performance metrics from Google Analytics and Google Search Console. This data will be invaluable for a before-and-after comparison.
2. Plan and Choose Migration Strategy
With your website audit complete, the next critical step in your website migration checklist is to define a clear plan and select the right migration strategy. This involves determining the best approach for moving your site based on its complexity, traffic volume, and your business's tolerance for downtime. Just as a general wouldn't send troops into battle without a plan, you shouldn't begin a migration without a well-defined strategy. This decision will dictate the timeline, resource allocation, and potential risks of the entire project.
Choosing the right strategy is fundamental to minimizing disruption. For example, Amazon’s infrastructure migrations often use a "parallel running" strategy, where the old and new systems run simultaneously to ensure zero downtime. In contrast, Wikipedia’s server migration used a "phased approach" over several weeks to carefully manage the transition of its massive database. The strategy you choose directly impacts user experience and business continuity.
Why It's a Critical Planning Step
Your migration strategy is the roadmap that guides every subsequent action. A poorly chosen strategy can lead to extended downtime, lost revenue, and a chaotic implementation process. By carefully evaluating your options, you can select the path that best aligns with your technical capabilities and business goals. This planning phase ensures all stakeholders are aligned and sets clear expectations for the project's execution and potential impact.
Actionable Tips for Your Strategy
To select and implement the most effective migration strategy, follow these practical steps:
- Choose a Strategy: For high-traffic, mission-critical sites, opt for a phased or parallel migration to minimize risk. A big-bang migration (all at once) may be suitable for smaller sites with low traffic.
- Time the Migration: Plan the move during your lowest traffic windows, which are typically late nights or weekends. Analyze your analytics to identify these periods accurately.
- Define Success: Establish clear, measurable success criteria. This could include metrics like "no more than a 5% drop in organic traffic" or "99.9% uptime in the first week."
- Build a Buffer: Allocate an extra 20-30% of time in your project plan for unexpected issues. Problems are common in migrations, and this buffer prevents delays. For a detailed understanding of the steps involved, especially if your website migration includes moving to a cloud environment, consult a comprehensive technical guide on how to migrate to cloud.
- Document Everything: Record the rationale behind your chosen strategy and share it with all stakeholders to ensure complete alignment and transparency.
3. Set Up Staging Environment
Once you have a complete blueprint of your current site, the next essential item on your website migration checklist is to create a staging environment. This is a private, non-public duplicate of your new website, built on a server that mimics your future live hosting environment. It acts as a controlled sandbox where you can build, test, and troubleshoot the migrated site without any risk to your current, live website or its users.

Think of it as a full dress rehearsal before opening night. E-commerce giant Shopify, for instance, offers merchants built-in staging capabilities, allowing them to test theme changes, app integrations, and content updates safely before pushing them to their live store. This practice is crucial for preventing costly errors, downtime, and a poor user experience on launch day.
Why It's a Critical Pre-Launch Step
Deploying a migration directly to a live server is a high-stakes gamble. A staging environment provides a crucial safety net, allowing your team to identify and fix everything from broken links and missing images to critical functionality bugs before your audience ever sees them. It’s the only way to ensure the new site works exactly as intended under realistic conditions, preserving your SEO equity and brand reputation.
Actionable Tips for Your Staging Setup
To create an effective staging environment, follow these best practices:
- Mirror Production: Your staging server should match your live server’s configuration as closely as possible, including PHP version, memory limits, and server software. This ensures consistency and prevents launch-day surprises. The quality of this setup often depends on your provider, so be sure to understand what to look for when choosing web hosting.
- Use Production-Like Data: Test with a recent copy of your live database. This helps you identify performance issues or bugs that only appear with a large volume of real-world content and user data.
- Test Critical Paths: Thoroughly test all key user journeys, such as the checkout process, contact form submissions, and user account creation.
- Verify Integrations: Ensure all third-party scripts and services, like analytics tools, marketing pixels, and payment gateways, are firing correctly in the staging environment.
- Restrict Access: Make sure the staging site is password-protected or IP-restricted and blocked from search engine crawlers using a
robots.txtfile ornoindextags to prevent duplicate content issues.
4. Backup All Data and Create Recovery Plan
Before a single file is moved, the most critical safety measure in your website migration checklist is to create a complete, verified backup of your entire site. This step involves more than just copying your database; it means securing every component, from website files and media assets to server configurations and email accounts. Think of this as your migration insurance policy, a failsafe that allows you to restore your original site instantly if anything goes wrong during the transition.
This process is about creating a perfect snapshot of your digital assets in a secure, accessible location. For instance, tech giants like GitHub employ highly redundant backup systems across multiple geographic locations to guarantee data integrity, a principle that businesses of any size should emulate. Without a proven backup, a minor migration error could lead to catastrophic, irreversible data loss, destroying years of work and customer trust in an instant.
Why It's a Critical Safety Net
Initiating a migration without a tested backup is an unnecessary and dangerous gamble. This backup is your ultimate undo button, protecting you from data corruption, server failures, or human error. Crucially, before initiating the migration, ensure you have a robust backup and disaster recovery plan in place to protect your data. This plan is not just about having a copy; it's about having a documented, tested procedure to restore it quickly and efficiently, minimizing downtime and business impact.
Actionable Tips for Your Backup Plan
To ensure your data is completely secure, follow these practical steps:
- Follow the 3-2-1 Backup Rule: Create at least three copies of your data. Store them on two different types of media (e.g., a local server and cloud storage). Keep at least one copy offsite to protect against local disasters like fire or theft.
- Test Your Recovery Procedures: A backup is only useful if it can be restored. Before the migration, perform a full test restore on a staging server to verify the integrity of your backup and iron out the recovery process.
- Document Everything: Keep a secure record of all backup locations, file types, and access credentials. This documentation is vital for a swift recovery during a high-pressure situation.
- Encrypt Your Backups: Protect sensitive business and customer data by encrypting all backups, both in transit and at rest.
- Schedule Final Backups Strategically: Perform your final, pre-migration backup during a period of low site traffic to ensure you capture the most up-to-date version of your website without disrupting users.
5. Update DNS Records and Domain Configuration
After setting up your new hosting environment, the next critical step in your website migration checklist is to update your DNS (Domain Name System) records. This action is like changing the address on a forwarding service for mail; it tells web browsers and services where to find your website's new home. This technical cutover is the moment your traffic officially starts flowing to the new server, making careful planning and timing absolutely essential to minimize downtime and user disruption.
This process involves modifying records like the A record (which points your domain to an IP address) and CNAME records with your domain registrar or DNS provider. For example, when Slack migrates its infrastructure, its teams coordinate a complex series of DNS changes across a global network to ensure uninterrupted service for millions of users. Properly managing this switch is what separates a seamless transition from a prolonged and chaotic outage that can cost you traffic and customer trust.
Why It's a Critical Cutover Step
Updating DNS records is the pivotal "go-live" moment of your migration. If handled incorrectly, visitors may see error pages, be unable to access your site, or even be directed to the old, decommissioned server for days. The goal is to make the switch as invisible as possible to the end-user. By carefully managing DNS propagation, you ensure that the transition to the new infrastructure is swift and that all users worldwide are quickly directed to the correct, updated version of your site.
Actionable Tips for DNS Management
To execute a smooth DNS cutover, follow these practical steps:
- Reduce TTL Before the Switch: Lower the Time-To-Live (TTL) value on your key DNS records to around 300 seconds (5 minutes) at least 24-48 hours before the migration. This tells servers to check for updates more frequently, speeding up propagation.
- Document Everything First: Take a screenshot and export a copy of all existing DNS records before making any changes. This documentation is your safety net if you need to revert.
- Verify DNS Propagation: Once you update the records, use tools like DNSChecker.org or whatsmydns.net to monitor propagation across the globe. This ensures the change is taking effect as expected.
- Keep Old Infrastructure Online: Do not decommission your old server immediately. Keep it running for at least 48-72 hours after the migration to serve any traffic that hasn't received the updated DNS information yet.
- Implement DNSSEC: If not already enabled, consider implementing DNSSEC (Domain Name System Security Extensions) during this process to add a layer of security that protects against DNS spoofing and other threats.
6. Implement 301 Redirects and URL Mapping
Once your new site is built, the most critical step for preserving your SEO authority is to implement a comprehensive 301 redirect and URL mapping strategy. This process involves creating a map that links every old URL to its new counterpart and setting up permanent (301) redirects. Think of it as filing a change of address form with the post office for your website; it tells search engines and users exactly where to find the content that has moved, ensuring a seamless transition of traffic and link equity.

This map is the lifeline of your SEO during a migration. For example, when Medium migrated its publishing platform, it meticulously maintained redirect paths for millions of articles, preventing a catastrophic loss of organic traffic. Failing to implement 301 redirects effectively is one of the quickest ways to destroy years of accumulated SEO value, as search engines will treat your new pages as entirely separate from the old, authoritative ones. This is a non-negotiable part of any serious website migration checklist.
Why It's a Critical Preservation Step
Without proper redirects, users clicking on old links from search results, bookmarks, or other websites will hit a 404 "Not Found" error, leading to a frustrating user experience and lost traffic. More importantly, search engines will drop your old pages from their index without passing any of the hard-earned authority (link equity) to your new URLs. A solid URL map ensures that every drop of SEO value is transferred correctly, protecting your rankings and organic visibility.
Actionable Tips for Your Redirect Strategy
To execute a flawless redirect plan, follow these practical steps:
- Create a Comprehensive URL Map: Using the crawl data from your initial audit, create a two-column spreadsheet. Column A should list every old URL, and Column B should list the corresponding new URL.
- Prioritize Server-Level Redirects: Implement redirects directly on your server using
.htaccess(for Apache) ornginx.conf(for Nginx) files. These are faster and more efficient for search engine crawlers than plugin-based or application-level redirects. - Test Every Redirect: Before going live, use a tool like Screaming Frog's "List Mode" to upload your URL map and crawl the old URLs. Verify that each one returns a 301 status code and redirects to the correct new page.
- Avoid Redirect Chains: Ensure that an old URL redirects directly to its final new destination. A redirect from Page A to Page B to Page C (a chain) can slow down crawling and dilute link equity.
- Monitor for 404 Errors: After launch, use Google Search Console's "Coverage" report to identify and fix any 404 errors caused by missed or broken redirects.
7. Test All Functionality and User Paths
Once your new site is built and the content is migrated, the next critical phase in your website migration checklist is comprehensive testing. This stage involves methodically evaluating every feature, function, and user journey on the new website to ensure it works exactly as intended and provides a seamless experience. Think of this as the final dress rehearsal before opening night; it's your last chance to catch and fix bugs, broken links, and functional gaps before your audience sees them.
This step ensures that the new site not only looks good but also functions flawlessly. For instance, major e-commerce platforms like Shopify run thousands of automated tests before deploying any changes, ensuring that critical paths like checkout processes are never compromised. Similarly, Airbnb's rigorous testing across multiple user personas and devices guarantees that a user can book a stay without friction, regardless of how they access the site. Neglecting this phase can lead to a disastrous launch, alienating users and costing you revenue from day one.
Why It's a Critical Pre-Launch Step
Launching an untested website is a direct path to user frustration and brand damage. Comprehensive testing is the only way to validate that all the hard work from the previous steps has paid off. It confirms that everything from your lead-capture forms to your payment gateways is working correctly. This process prevents post-launch emergencies, protects your revenue streams, and ensures a positive user experience, which is crucial for maintaining customer trust and SEO rankings.
Actionable Tips for Your Testing
To execute a robust testing plan, follow these practical steps:
- Create a Detailed Test Plan: Document all critical user paths, such as user registration, login, product search, adding items to a cart, and completing a purchase. Assign these test cases to your team.
- Combine Manual and Automated Testing: Use automated tools for repetitive checks like link validation, but perform manual testing for user experience and complex workflows to catch issues an algorithm would miss.
- Test Across Browsers and Devices: Verify functionality on all major browsers (Chrome, Firefox, Safari, Edge) and perform mobile testing on a range of real devices, not just emulators.
- Verify Forms and Integrations: Test every single form, from simple contact forms to complex checkout processes. Ensure all third-party integrations and email notifications are triggering correctly.
- Perform Load Testing: Use tools like JMeter or LoadRunner to simulate production-level traffic. This ensures your new server can handle the expected volume without crashing or slowing down.
8. Monitor Performance and Set Up Analytics
A critical component of any website migration checklist is implementing comprehensive monitoring and analytics from the very start. This involves setting up systems to track website performance, user behavior, and overall system health before, during, and after the migration. Think of this as your website's health monitor; it provides the real-time data needed to diagnose problems, measure success, and make informed decisions. This continuous feedback loop is essential for a smooth transition and long-term stability.
Effective monitoring prevents you from flying blind post-launch. For instance, large-scale platforms like Netflix continuously monitor billions of data points in real time to ensure service availability and a seamless user experience. By setting up robust analytics and performance tracking before you migrate, you establish a baseline that makes it possible to immediately spot and address any negative impacts on page load times, error rates, or conversion goals.
Why It's a Critical Step
Without proactive monitoring, you are left reacting to problems only after they have impacted your users and your bottom line. Setting up analytics ensures you can quantify the migration's success by comparing pre-launch and post-launch metrics. This data-driven approach allows you to verify that SEO value has been preserved, user engagement is stable, and business-critical functions are performing as expected. It transforms a high-stakes guess into a controlled, measurable process.
Actionable Tips for Your Monitoring Setup
To implement a robust monitoring strategy, follow these practical steps:
- Establish a Baseline: Set up all analytics and monitoring tools on your old site well before the migration to collect benchmark data. This is fundamental to understanding how to track website traffic and performance effectively.
- Define Key Metrics: Identify and track crucial metrics such as server response time, page load speed (Core Web Vitals), 404 error rates, and conversion rates.
- Configure Alerts: Set up automated alerts for critical events, like a sudden spike in 5xx server errors or a significant drop in organic traffic, to enable a rapid response.
- Use Synthetic Monitoring: Employ tools that simulate user traffic to your key pages from different locations to proactively check for uptime and performance issues 24/7.
- Create Dashboards: Build custom dashboards in Google Analytics 4, Google Search Console, or other business intelligence tools to give stakeholders a clear, at-a-glance view of post-migration performance.
- Centralize Logs: Implement a centralized logging system to aggregate server logs, which is invaluable for quickly diagnosing and troubleshooting technical problems.
9. Execute Migration Cutover
This is the moment of truth in your website migration checklist: the cutover. This is the process of officially switching DNS records to direct all user traffic from the old website to the new one. It requires precise timing, flawless execution, and real-time monitoring to minimize downtime and ensure a seamless transition for your users. Think of it as the final, delicate move in a high-stakes game of Jenga, where one wrong step can bring everything crashing down.
The goal of the cutover is to make the switch invisible to the end-user. When large platforms like Facebook or Twitter execute infrastructure migrations, they do so with military-grade precision, coordinating across global teams and time zones to prevent any service disruption for billions of users. This level of planning is what separates a smooth launch from a post-migration disaster, making the cutover a pivotal point in the project.
Why It's a Critical Go-Live Step
A poorly executed cutover can instantly negate months of hard work. If DNS changes are not propagated correctly, redirects fail, or databases don't sync, you risk significant downtime, data loss, and a catastrophic drop in SEO rankings. This phase is where all your preparation, from the initial audit to the final tests, comes together. A well-orchestrated cutover ensures that the new site inherits the authority and traffic of the old one without missing a beat.
Actionable Tips for Your Cutover
To ensure a smooth and controlled go-live, follow these practical steps:
- Schedule Strategically: Plan the cutover for a period of minimal traffic, such as early on a weekday morning. This reduces the number of users affected by potential issues.
- Create a Detailed Runbook: Document every single step of the cutover process, from DNS changes to cache clearing. Assign specific responsibilities to team members.
- Establish a War Room: Set up a dedicated communication channel (like a Slack channel or video conference) for real-time updates and immediate troubleshooting.
- Prepare for Rollback: Have a tested and documented rollback plan ready. You must be able to quickly revert to the old site if a critical, unfixable error occurs.
- Monitor Vigorously: As soon as the cutover begins, have your team monitor key metrics in real-time. This includes server response times, error logs, and initial traffic data from analytics.
10. Verify Migration Success and Post-Migration Validation
The final, crucial step in your website migration checklist is the comprehensive validation that the new site is functioning exactly as intended. This isn't just about checking if the site is live; it’s a deep-dive verification of data integrity, functionality, performance, and SEO metrics. Think of it as the final inspection after a home renovation, where you test every light switch, open every door, and check every faucet to ensure the work was completed to specification. This post-launch validation confirms that your efforts have paid off and prevents minor oversights from becoming major business problems.
This verification phase is your ultimate quality assurance gate. It ensures that the user experience remains seamless and that your hard-earned SEO authority has been successfully transferred. For instance, when major platforms like GitHub execute infrastructure migrations, they employ extensive post-migration validation with automated testing suites to confirm that millions of repositories are accessible and all developer tools are operational. This rigorous checking process is what separates a smooth transition from a post-launch disaster.
Why It's a Critical Final Step
Launching the new site is the beginning, not the end. Without a thorough post-migration validation plan, you are flying blind. You might not notice a drop in conversion rates, a broken critical user pathway, or a sudden decline in search rankings for weeks. This final check allows you to catch and fix issues immediately, minimizing negative impact on revenue, user trust, and search engine visibility. It provides the concrete data needed to confirm the migration was a success.
Actionable Tips for Your Validation
To execute a comprehensive post-migration check, follow these practical steps:
- Compare Analytics Data: Dive into Google Analytics. Compare pre- and post-migration data for traffic sources, user behavior metrics (like bounce rate and time on page), and conversion rates.
- Verify URL Accessibility: Use your crawl data from the audit phase. Run a new crawl with a tool like Screaming Frog to confirm all old URLs are redirecting correctly and that new URLs return a 200 OK status code.
- Check Search Engine Visibility: Monitor Google Search Console closely. Check the Index Coverage report for any new errors, and use the URL Inspection tool to verify that key pages are being indexed correctly.
- Run a Full Regression Test: Execute your pre-launch test suite one more time on the live environment. This confirms that all forms, checkouts, and interactive elements are functioning as expected for real users.
- Monitor User Feedback: Keep a close eye on customer support tickets, social media mentions, and on-site feedback channels for any user-reported issues.
10-Point Website Migration Checklist Comparison
| Task | Complexity 🔄 | Resources ⚡ | Expected outcomes 📊 | Ideal use cases 💡 | Key advantages ⭐ |
|---|---|---|---|---|---|
| Audit and Document Current Website | Moderate → High: thorough site crawl and technical review | SEO crawlers, analytics export, technical expertise | Complete baseline, issue discovery, inventory for migration | Large, legacy or content-heavy sites | Prevents content loss, enables rollback and accurate planning |
| Plan and Choose Migration Strategy | High: risk assessment and timeline planning | Stakeholders, architects, project managers | Clear migration path, risk mitigation, phased timelines | High-traffic or complex platform moves | Reduces confusion, improves resource allocation and fallback options |
| Set Up Staging Environment | Moderate → High: replicate production parity | Additional servers/containers, config management tools | Safe testing, performance benchmarking, debugging area | Any migration requiring validation before cutover | Identifies issues pre-prod; supports realistic testing |
| Backup All Data and Create Recovery Plan | Moderate: design backup schedules and tests | Backup storage, automation, encryption tools | Recoverability, compliance, rollback capability | Every migration (critical for data-sensitive sites) | Protects against data loss; enables confident rollback |
| Update DNS Records and Domain Configuration | Moderate: careful timing and coordination | DNS management access, monitoring tools | Traffic redirection, CDN integration, gradual shifting | Final cutovers or staged traffic moves | Enables global rerouting and quick DNS-based rollback |
| Implement 301 Redirects and URL Mapping | Moderate: mapping and server rule implementation | Dev time, server/ CDN config access, redirect tools | Preserved SEO, fewer 404s, maintained UX | URL structure changes or platform migrations | Maintains search authority and user continuity |
| Test All Functionality and User Paths | High: exhaustive functional and regression testing | QA engineers, automated tools, real devices | Feature parity, fewer post-launch issues, validated flows | Any migration with critical user journeys | Catches regressions and verifies critical user paths |
| Monitor Performance and Set Up Analytics | Moderate: configure RUM/APM and alerts | Monitoring stack (RUM, APM, logging), dashboards | Real-time visibility, fast issue detection, baseline comparison | Before, during, and after migration | Data-driven detection and continuous optimization |
| Execute Migration Cutover | High: precise, time-bound execution under pressure | Full ops team, runbooks, communication channels | Traffic switched to new infra; potential downtime if issues | Final production switch or big-bang migrations | Enables decisive transition; allows old infra teardown |
| Verify Migration Success and Post-Migration Validation | Moderate: comprehensive checks across systems | Analysts, automated tests, SEO/tools access | Confirmed integrity, performance parity, stakeholder sign-off | Immediately after cutover for closure | Validates success, surfaces remaining issues, documents outcomes |
From Checklist to Confidence: Your Next Steps
Navigating the complexities of a website migration can feel like a high-stakes tightrope walk. One misstep, and years of SEO equity, brand trust, and user experience can be jeopardized. However, as we've detailed, this process is not about luck; it's about meticulous planning and disciplined execution. This comprehensive website migration checklist is your strategic blueprint, designed to transform a daunting project into a controlled, successful evolution of your digital presence.
By breaking down the migration into ten distinct phases-from the initial audit and strategic planning to the critical implementation of 301 redirects and post-launch monitoring-you demystify the process. Each step builds upon the last, creating a robust framework that minimizes risk and maximizes reward. This is more than just a series of tasks; it's a methodology for protecting your most valuable digital asset.
Key Takeaways for a Flawless Migration
The true value of this checklist lies not just in what you do, but how you do it. Let’s distill the core principles that will make the biggest difference:
- Proactive Planning is Paramount: The success of your migration is determined long before the cutover date. The time you invest in auditing your current site, mapping every URL, and defining a clear strategy will pay dividends by preventing costly post-launch emergencies.
- Testing is Non-Negotiable: A thorough, multi-layered testing protocol in your staging environment is your best defense against failure. Test everything: functionality, user paths, forms, analytics tracking, and especially your redirect map. Assume nothing works until you have proven it does.
- SEO Preservation is an Active Process: Protecting your search rankings is not a passive outcome. It requires a dedicated effort, centered around a flawless 301 redirect strategy, careful content migration, and immediate post-launch verification using tools like Google Search Console. Losing organic traffic is a direct blow to your bottom line.
Ultimately, mastering this website migration checklist empowers you to take control. It provides the structure needed to coordinate with developers, content creators, and marketing teams, ensuring everyone is aligned and working towards a common goal. This isn't just about moving a website; it's about elevating your platform, improving performance, and creating a better experience for your audience without sacrificing the authority you've worked so hard to build.
A successful migration strengthens your digital foundation, opening doors to better performance, enhanced security, and new functionalities that drive business growth. It's a strategic investment in your future, and with this detailed plan, you can approach it with the confidence of a seasoned expert. Your website is the engine of your digital brand; treat its migration with the precision engineering it deserves.
Feeling overwhelmed by the technical details of a migration? Sugar Pixels specializes in executing seamless, SEO-focused website migrations for businesses of all sizes. Let our expert team handle the complexities, so you can focus on what you do best. Visit Sugar Pixels to secure your digital future.